Running Bitcoin
There are two variations of the original bitcoin program available; one with a graphical user interface (usually referred to as just “Bitcoin”), and a 'headless' version (called bitcoind). They are completely compatible with each other, and take the same command-line arguments, read the same configuration file, and read and write the same data files. You can run one copy of either Bitcoin or bitcoind on your system at a time (if you accidently try to launch another, the copy will let you know that Bitcoin or bitcoind is already running and will exit).
Contents
Linux Quickstart
The simplest way to start from scratch with the command line client, automatically syncing blockchain and creating a wallet, is to just run this command (without arguments) from the directory containing your bitcoind binary:
./bitcoind
To run with the standard GUI interface:
./bitcoin-qt
Command-line arguments
Give Bitcoin (or bitcoind) the -? or –-help argument and it will print out a list of the most commonly used command-line arguments and then exit:
Options:
 -?                     This help message
 -conf=<file>           Specify configuration file (default: bitcoin.conf)
 -pid=<file>            Specify pid file (default: bitcoind.pid)
 -gen                   Generate coins (default: 0)
 -datadir=<dir>         Specify data directory
 -dbcache=<n>           Set database cache size in megabytes (default: 25)
 -timeout=<n>           Specify connection timeout in milliseconds (default: 5000)
 -proxy=<ip:port>       Connect through socks proxy
 -socks=<n>             Select the version of socks proxy to use (4-5, default: 5)
 -tor=<ip:port>         Use proxy to reach tor hidden services (default: same as -proxy)
 -dns                   Allow DNS lookups for -addnode, -seednode and -connect
 -port=<port>           Listen for connections on <port> (default: 8333 or testnet: 18333)
 -maxconnections=<n>    Maintain at most <n> connections to peers (default: 125)
 -addnode=<ip>          Add a node to connect to and attempt to keep the connection open
 -connect=<ip>          Connect only to the specified node(s)
 -seednode=<ip>         Connect to a node to retrieve peer addresses, and disconnect
 -externalip=<ip>       Specify your own public address
 -onlynet=<net>         Only connect to nodes in network <net> (IPv4, IPv6 or Tor)
 -discover              Discover own IP address (default: 1 when listening and no -externalip)
 -checkpoints           Only accept block chain matching built-in checkpoints (default: 1)
 -listen                Accept connections from outside (default: 1 if no -proxy or -connect)
 -bind=<addr>           Bind to given address and always listen on it. Use [host]:port notation for IPv6
 -dnsseed               Find peers using DNS lookup (default: 1 unless -connect)
 -banscore=<n>          Threshold for disconnecting misbehaving peers (default: 100)
 -bantime=<n>           Number of seconds to keep misbehaving peers from reconnecting (default: 86400)
 -maxreceivebuffer=<n>  Maximum per-connection receive buffer, <n>*1000 bytes (default: 5000)
 -maxsendbuffer=<n>     Maximum per-connection send buffer, <n>*1000 bytes (default: 1000)
 -upnp                  Use UPnP to map the listening port (default: 1 when listening)
 -paytxfee=<amt>        Fee per KB to add to transactions you send
 -server                Accept command line and JSON-RPC commands
 -testnet               Use the test network
 -debug                 Output extra debugging information. Implies all other -debug* options
 -debugnet              Output extra network debugging information
 -logtimestamps         Prepend debug output with timestamp
 -shrinkdebugfile       Shrink debug.log file on client startup (default: 1 when no -debug)
 -printtoconsole        Send trace/debug info to console instead of debug.log file
 -printtodebugger       Send trace/debug info to debugger
 -rpcuser=<user>        Username for JSON-RPC connections
 -rpcpassword=<pw>      Password for JSON-RPC connections
 -rpcport=<port>        Listen for JSON-RPC connections on <port> (default: 8332 or testnet: 18332)
 -rpcallowip=<ip>       Allow JSON-RPC connections from specified IP address
 -rpcthreads=<n>        Set the number of threads to service RPC calls (default: 4)
 -blocknotify=<cmd>     Execute command when the best block changes (%s in cmd is replaced by block hash)
 -walletnotify=<cmd>    Execute command when a wallet transaction changes (%s in cmd is replaced by TxID)
 -alertnotify=<cmd>     Execute command when a relevant alert is received (%s in cmd is replaced by message)
 -upgradewallet         Upgrade wallet to latest format
 -keypool=<n>           Set key pool size to <n> (default: 100)
 -rescan                Rescan the block chain for missing wallet transactions
 -salvagewallet         Attempt to recover private keys from a corrupt wallet.dat
 -checkblocks=<n>       How many blocks to check at startup (default: 288, 0 = all)
 -checklevel=<n>        How thorough the block verification is (0-4, default: 3)
 -txindex               Maintain a full transaction index (default: 0)
 -loadblock=<file>      Imports blocks from external blk000??.dat file
 -reindex               Rebuild block chain index from current blk000??.dat files
 -par=<n>               Set the number of script verification threads (up to 16, 0 = auto, <0 = leave that many cores free, default: 0)
Block creation options:
 -blockminsize=<n>      Set minimum block size in bytes (default: 0)
 -blockmaxsize=<n>      Set maximum block size in bytes (default: 250000)
 -blockprioritysize=<n> Set maximum size of high-priority/low-fee transactions in bytes (default: 27000)
 -mintxfee=<m.n>        Minimum  fee-per-kilobyte to qualify as fee-paying (default: 0.0001)
SSL options: (see the Bitcoin Wiki for SSL setup instructions)
 -rpcssl                                  Use OpenSSL (https) for JSON-RPC connections
 -rpcsslcertificatechainfile=<file.cert>  Server certificate file (default: server.cert)
 -rpcsslprivatekeyfile=<file.pem>         Server private key (default: server.pem)
 -rpcsslciphers=<ciphers>                 Acceptable ciphers (default: TLSv1+HIGH:!SSLv2:!aNULL:!eNULL:!AH:!3DES:@STRENGTH)
UI options:
 -lang=<lang>           Set language, for example "de_DE" (default: system locale)
 -min                   Start minimized
 -splash                Show splash screen on startup (default: 1)
Many of the boolean options can also be set to off by specifying them with a "no" prefix: e.g. -nodnseed.
Bitcoin.conf Configuration File
All command-line options (except for -datadir and -conf) may be specified in a configuration file, and all configuration file options may also be specified on the command line. Command-line options override values set in the configuration file.
The configuration file is a list of setting=value pairs, one per line, with optional comments starting with the '#' character.
The configuration file is not automatically created; you can create it using your favorite plain-text editor. By default, Bitcoin (or bitcoind) will look for a file named 'bitcoin.conf' in the bitcoin data directory, but both the data directory and the configuration file path may be changed using the -datadir and -conf command-line arguments.
| Operating System | Default bitcoin datadir | Typical path to configuration file |
|---|---|---|
| Windows | %APPDATA%\Bitcoin\ | (XP) C:\Documents and Settings\username\Application Data\Bitcoin\bitcoin.conf
(Vista, 7) C:\Users\username\AppData\Roaming\Bitcoin\bitcoin.conf |
| Linux | $HOME/.bitcoin/ | /home/username/.bitcoin/bitcoin.conf |
| Mac OSX | $HOME/Library/Application Support/Bitcoin/ | /Users/username/Library/Application Support/Bitcoin/bitcoin.conf |
Note: if running Bitcoin in testnet mode, the sub-folder "testnet" will be appended to the data directory automatically.
Sample Bitcoin.conf
Here is a sample bitcoin.conf file.
 # bitcoin.conf configuration file. Lines beginning with # are comments.


 # Network-related settings:

 # Run on the test network instead of the real bitcoin network.
 #testnet=0

 # Connect via a socks4 proxy
 #proxy=127.0.0.1:9050

 ##############################################################
 ##            Quick Primer on addnode vs connect            ##
 ##  Let's say for instance you use addnode=4.2.2.4          ##
 ##  addnode will connect you to and tell you about the      ##
 ##    nodes connected to 4.2.2.4.  In addition it will tell ##
 ##    the other nodes connected to it that you exist so     ##
 ##    they can connect to you.                              ##
 ##  connect will not do the above when you 'connect' to it. ##
 ##    It will *only* connect you to 4.2.2.4 and no one else.##
 ##                                                          ##
 ##  So if you're behind a firewall, or have other problems  ##
 ##  finding nodes, add some using 'addnode'.                ##
 ##                                                          ##
 ##  If you want to stay private, use 'connect' to only      ##
 ##  connect to "trusted" nodes.                             ##
 ##                                                          ##
 ##  If you run multiple nodes on a LAN, there's no need for ##
 ##  all of them to open lots of connections.  Instead       ##
 ##  'connect' them all to one node that is port forwarded   ##
 ##  and has lots of connections.                            ##
 ##       Thanks goes to [Noodle] on Freenode.               ##
 ##############################################################

 # Use as many addnode= settings as you like to connect to specific peers
 #addnode=69.164.218.197
 #addnode=10.0.0.2:8333

 # ... or use as many connect= settings as you like to connect ONLY
 # to specific peers:
 #connect=69.164.218.197
 #connect=10.0.0.1:8333


 # Maximum number of inbound+outbound connections.
 #maxconnections=


 # JSON-RPC options (for controlling a running Bitcoin/bitcoind process)

 # server=1 tells Bitcoin-QT to accept JSON-RPC commands.
 #server=0

 # You must set rpcuser and rpcpassword to secure the JSON-RPC api
 #rpcuser=Ulysseys
 #rpcpassword=YourSuperGreatPasswordNumber_DO_NOT_USE_THIS_OR_YOU_WILL_GET_ROBBED_385593

 # How many seconds bitcoin will wait for a complete RPC HTTP request.
 # after the HTTP connection is established.
 #rpctimeout=30

 # By default, only RPC connections from localhost are allowed.  Specify
 # as many rpcallowip= settings as you like to allow connections from
 # other hosts (and you may use * as a wildcard character).
 # NOTE: opening up the RPC port to hosts outside your local
 # trusted network is NOT RECOMMENDED, because the rpcpassword
 # is transmitted over the network unencrypted.
 #rpcallowip=10.1.1.34
 #rpcallowip=192.168.1.*

 # Listen for RPC connections on this TCP port:
 #rpcport=8332

 # You can use Bitcoin or bitcoind to send commands to Bitcoin/bitcoind
 # running on another host using this option:
 #rpcconnect=127.0.0.1

 # Use Secure Sockets Layer (also known as TLS or HTTPS) to communicate
 # with Bitcoin -server or bitcoind
 #rpcssl=1

 # OpenSSL settings used when rpcssl=1
 #rpcsslciphers=TLSv1+HIGH:!SSLv2:!aNULL:!eNULL:!AH:!3DES:@STRENGTH
 #rpcsslcertificatechainfile=server.cert
 #rpcsslprivatekeyfile=server.pem


 # Miscellaneous options

 # Set gen=1 to attempt to generate bitcoins
 #gen=0

 # Pre-generate this many public/private key pairs, so wallet backups will be valid for
 # both prior transactions and several dozen future transactions.
 #keypool=100

 # Pay an optional transaction fee every time you send bitcoins.  Transactions with fees
 # are more likely than free transactions to be included in generated blocks, so may
 # be validated sooner.
 #paytxfee=0.00

 # Allow direct connections for the 'pay via IP address' feature.
 #allowreceivebyip=1

 # User interface options

 # Start Bitcoin minimized
 #min=1

 # Minimize to the system tray
 #minimizetotray=1
Platforms
Windows
Start automatically
To configure the Bitcoin client to start automatically:
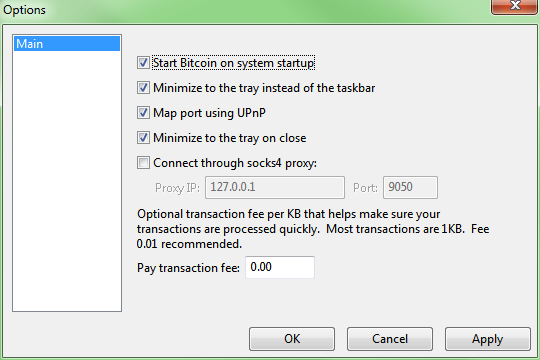
You might use the configuration-file, or the GUI-Settings:
Settings -> Options
then mark the checkbox titled:
[X] Start Bitcoin on system startup
Batch automation
To work with batch, you have to start the daemon (bitcoind.exe). The bitcoin.exe run with option "-server" will respond with GUI-messages you are not able to process its answers.


